Photo Proofing in the Gallery Module allows users to select images and send them to the admin for approval. It is helpful to let users have their own selection, vote for multiple photos, improve workflows, and many more.
As an admin, you will have a few features inside this photo-proofing setting. That will be vastly useful for both the website admin and users browsing your website.
How to Enable Photo Proofing
By following some simple steps, you (as admin) can enable the photo proofing feature. Try to follow the guidelines below to set everything up for you.
Step-1: Install & Activate the Plugin
- Log in to your website’s admin panel.
- Navigate to the “Plugins” section.
- Click on “Add New.”
- In the search bar, type “Connect Drive” and press Enter.
- Locate the “Connect Drive” plugin by WPCloudConnect from the search results.
- Click on the “Install Now” button.
- After installation, click on the “Activate” button to activate the plugin.
- You will now see the “Connect Drive” plugin listed in your active plugins.
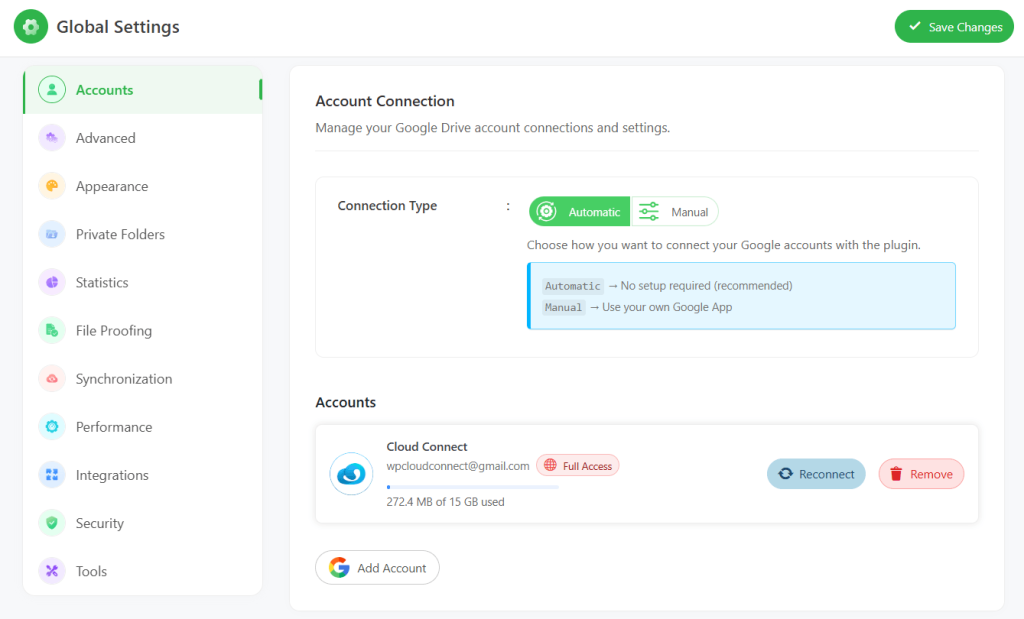
Step-2: Connect Google Drive Account
- Navigate to the “Google Drive” section, typically found in the plugin’s settings or configuration area.
- Within the Google Drive “Settings”, locate and click on the “Accounts” tab.
- Look for the “Add New Account” button > click on it and add your Google Account.
- Allow the necessary permissions Google is asking for.
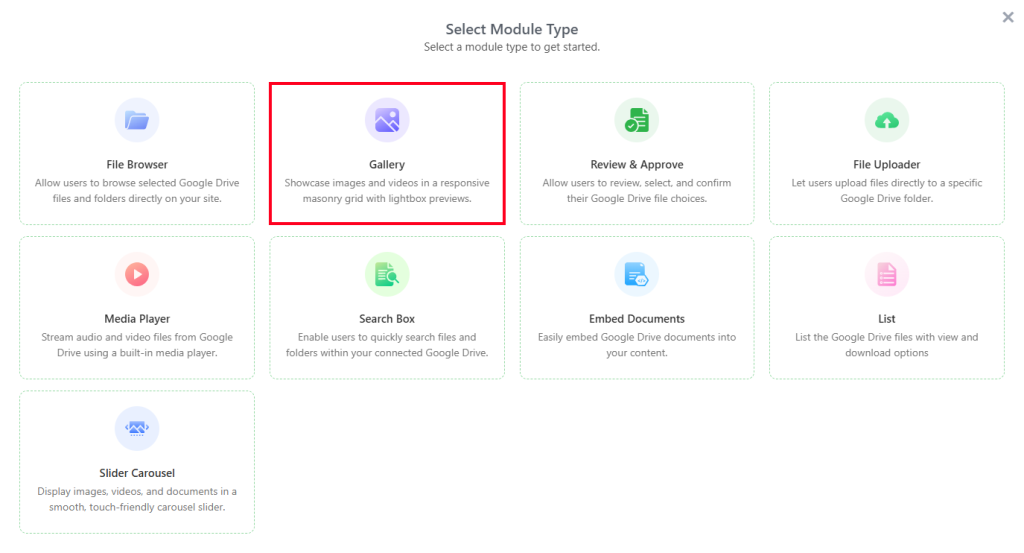
Step-3: Create Gallery Module
- Navigate to the “Google Drive” section.
- Click the “Module Builder”.
- Within the Module Builder, find and click on the “Add New Module” button.
- Look for the “Gallery” module and select it.
- Now configure the module as per the requirement.
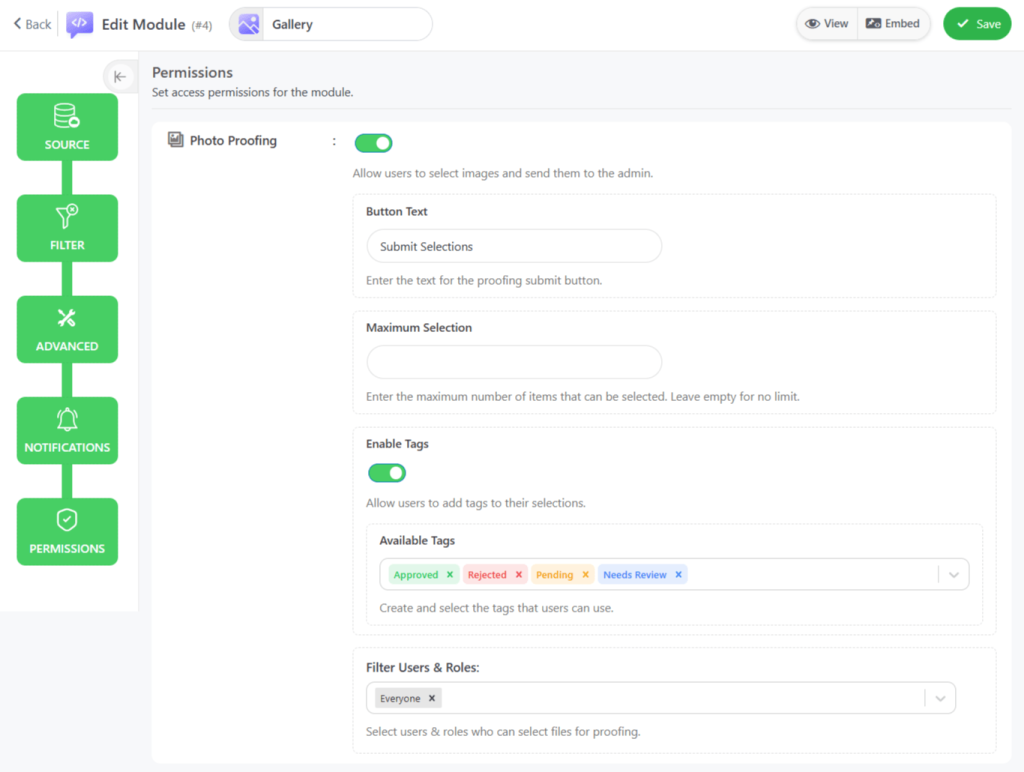
Step-3: Set up Photo Proofing
While configuring the Gallery module, you will notice multiple tabs on the left side. Navigate to the “Permissions” tab, where you will discover “Photo Proofing” settings.
- Photo Proofing: Allow users to select images and send them to the admin.
- Button Text: Enter the text for the proof selections submit button.
- Maximum Selection: Enter the maximum number of images that can be selected. Leave empty for no limit.
- Enable Tags: Allow users to add tags to their selections.
- Filter Users & Roles: Select users & roles who can be selected.
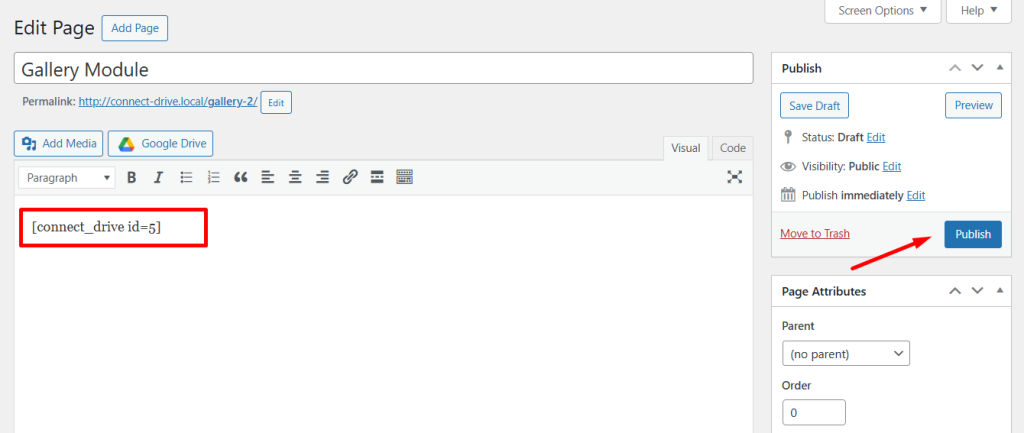
Step-4: Display the Gallery Module
Go to the desired page or post in your website’s admin panel.
- Locate the section where you want to add the gallery. Click on the “Add Block” or “+ Add” button to open the block editor.
- Paste the Gallery Shortcode.
- Click the “Update” or “Publish” button to save your changes and make the gallery live on the page or post.
Step-5: Output
Now, once users send files, the admin will get an email notification to the given email address. As an admin, you also download submissions by clicking on the “Download CSV” button.
